- 0 comments
- 4129 views
News
Manage articles


Thinking about the Wheel of Time, I was pondering the fact that I didn't discover Robert Jordan or his books until after he left us. So, lately, I've been on a search for him, who he was, what he was like as a man, a writer, and how his stories came to be. My journey is one of starting and stopping, and yet, one that I will undertake fully.
I was not a reader of fantasy or nonfiction for that matter. A friend urged me to pick up The Eye of the World and that's where I fell deep into the universe of Robert Jordan.
His world is female-centric, with a complicated magic system, multiple nations, cultures (some I could recognize), and a central character who finally realized who and what he was, and his place in the world.
Our Dragonmount was created upon the imagination and words of Robert Jordan. Although the books are finished, his universe continues.
The White Tower lives on here, as do the Aiel, Mat's Band, Perrin's Wolves, the Black Tower, the Kin, the Ogier and their Groves, the Tuathan'an Camp, and there is even a place for the Dark One’s in
Shayol Ghul. One can create a unique character who lives and breathes within the Wheel of Time.
For those of you, who like me, never want to put down the books and walk away from The Wheel of Time, Dragonmount carries on Robert Jordan's world and allows us all to be a part of it.
See you next month.
- 0 comments
- 2775 views


To begin, I would like to start with something I myself would love to have! It summarizes the Yellow Ajah quite well, I think.
Yellow Ajah iPhone 5c Case (made from this source) ~ minniearts
The next piece is quite lovely; I especially love the bright use of colors in this drawing. It makes me wonder if those flowers have a medicinal use!
Yellow Ajah ~ Asrath
And of course we couldn't be talking about the Yellow Ajah without a shout out to the most prominent member: Nynaeve! The look on her face in this drawing captures the perfect deadpan look that Nynaeve is so often striving for. She appears thoroughly not amused and done with all foolishness.
Nynaeve al'Meara ~ fee-absinthe
Of course one cannot be of the Yellow Ajah without the accompanying shawl! This exquisite piece looks quite cozy and warm!
Yellow Ajah Shawl - Wheel of Time ~ Elarielle
The final work is an outfit that a modern day Yellow Sister might find herself wearing on a day out at the beach!
Yellow Ajah - Beach Bunny ~ inspiredbywot
Keep an eye out next month for a late summer edition of Fan Art Friday!

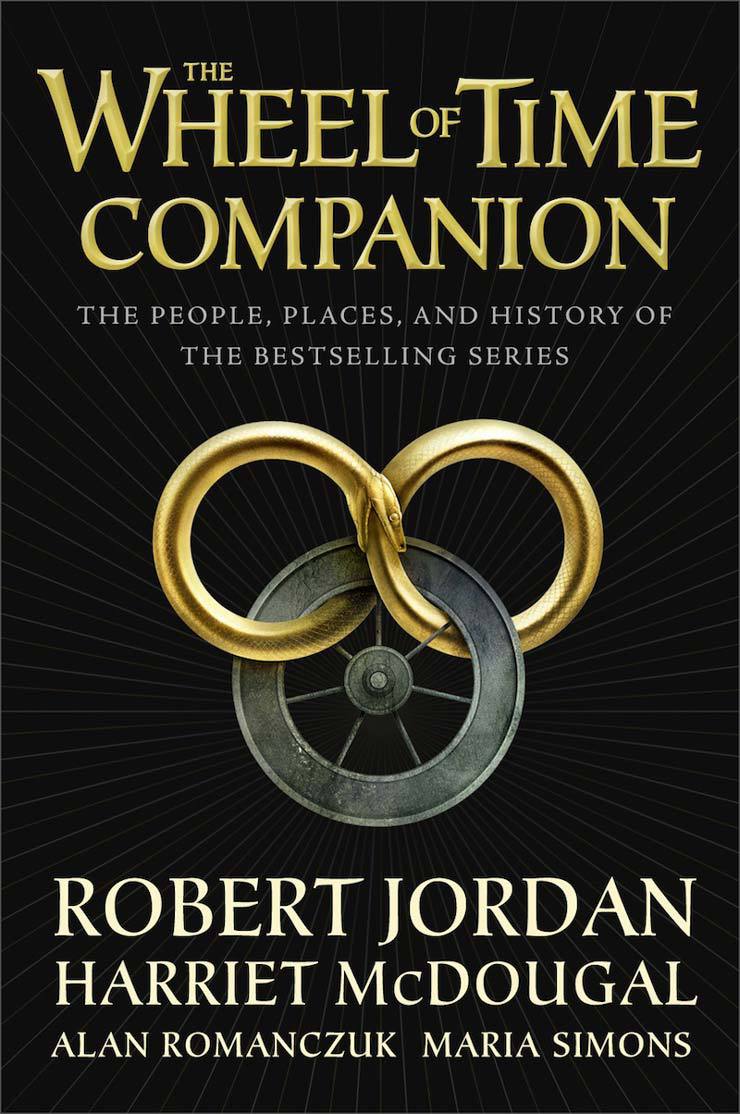
The Wheel of Time Companion was edited by Harriet McDougal, Maria Simons and Alan Romanczuk. Harriet was the primary editor of the series, as well as the wife of author Robert Jordan. Alan and Maria both served as continuity editors for the series. The Companion is an encyclopedia style compendium of the characters, places and objects named in The Wheel of Time series. Some sections were taken directly from Jordan's vast notes.
We do not yet know if any members of Team Jordan plan on attending the award ceremony. In 2014, when the series was nominated for a Hugo, both Harriet and Maria traveled to the London WorldCon and appeared on programming.


About 72 inch x 11 inch rectangle of fabric in all seven Ajah colors
About 4 yards of a backing fabric
White fabric (for the Flame of Tar Valon)
9 yards bias tape
Quilt batting for a 72 inch x 72 inch quilt
Clear quilter’s thread
Sewing machine
Scissor
Pins
Measuring tape
Step 1: Select your fabrics
I decided to attempt this project with my sister, Mavin. This quilt requires little bits of a lot of fabrics, so it made sense to divide the cost in half. We wound up purchasing two yards of each fabric (giving us our desired 72 inch length), then slicing it in half width wise to divvy it up between us. We both got 72” x 37” rectangles from all our seven fabrics. With my half, I was able to cut that 37” in half again, giving me my need 11” width and an extra 27” left over for other projects.
We selected our fabrics with patterns. This added just a bit more character and individuality to the quilt instead of having just plain cotton colors. Because of this, we selected a pattern that fit each Ajah’s theme—even if only in our minds. The blue looks lacy and regal, like my idea of Moiraine. The green is leafy, like a Warder’s fancloth cloak. The brown has swirls inside, like the chapter icon for Tel’aranrhiod, and that reminds me of Verin, who gave the dream ter’angreal to Egwene so long ago. This is where you can customize to your specific wants. Make this quilt completely your own!
For the back fabric, I wanted to have that secret Ajah incorporated, so I chose a black with white flowers. Mavin, wanting to go for comfort and personal Ajah identification, chose a yellow fleece. Once again, pick what’s special for you. It makes the finished product that much more meaningful.
For the Flame of Tar Valon, I picked a white satin I had on hand. Mavin used a white fleece to match her backing.
Step 2: Cut your fabrics
As I said, we had the intention of slicing each cut of fabric in half, giving us each a 72” by 37” rectangle. I played with several ways to set up the quilt—one version using the whole 37” of each color—but decide it would look best as a square. Since our lengths were 72”, that meant our width needed to be equal to that. Simple math says you divide the total by seven to get about 10.5” per color (including seam allowance). It’s easiest to use a rotary cutter and a cutting mat to trim the rectangles to the proper length.
Step 3: Sewing the face
I am going to call the side with the seven Ajah colors “the face,” or the front, of the quilt. The Black Ajah is, of course, the back. For the Ajah colors, I wanted to have them appear in the order that they are on the Amyrlin Stole, so I had to look at an example in canon where they are shown. The order, from top to bottom, is: Blue, Green, Yellow, Red, Gray, White, and Brown.
First take your blue and green fabrics and place them atop each other, right side to right side, with the green fabric on top. Straight stitch them together along the right edge.
When you flip them open, the blue is on the left side; this will signify up, or the top.
Next, lay the green flat and put the yellow on top, right side to right side. Again, stitch up the right side. When you open them, you have blue, then green, then yellow.
Lay the yellow flat and place the red fabric on top, right side to right side. Stitch up the right side. Now you have blue, green, yellow, and red.
Sew the gray onto the red. Sew the white onto the gray. Sew the brown onto the white.
When you lay it flat, it should look like this:
You’re done with the face!
Step 4: Backing
Since you can’t buy fabric that is 72”x72”—at least, as far as I know—you need to construct the back to be the proper size. I cut my 4 yards of backing fabric in half, giving me two 2 yard pieces.
Since the length was already 72”, I didn’t need to change that. But the width on both was 52”. I sewed the two pieces together, right side to right side, along their 72” side. This gave me a 72” by 104” rectangle. This created a lot of waste since I wanted the seam to be right in the middle, but I saved the scraps for other projects.
Step 5: The Flame of Tar Valon
You could just as easily add the Flame to the face of the quilt. I think it would look great either way. I didn’t want to cover up any of my beautiful Ajah fabrics, so I decided to put it on the back. I cut my white satin into a circle, then drew out the sinuous line that separates both sides.
If done correctly, this will give you two equally sized Flames. Since my satin was a bit thin, I layered both of these pieces to give me a more opaque finish.
Measure to the center of your backing fabric, both length and width. Pin your Flame in place. Stitch around the edge with a white thread, or the clear quilter’s thread.
If you’re using a fabric that frays—like my satin—I’d recommend using Frey Check on the outside edges to keep the seam clean. This can be applied before or after you sew it down.
Step 6: Stacking the quilt
With the face and the back done, we can start laying the quilt. Place the backing face down on the floor. Next, lay down the batting. Finally, lay the front of the quilt face up.
Pin all three layers together and trim the batting and backing to the same size as the face. You may see a lot of excess fabric from the backing, but don’t panic. You can save it! Never underestimate fabric scraps!
Step 7: Quilting
If you’ve seen traditional quilts, you’ve probably noticed that the layers get sewn to each other in a sort of pattern. Typically, if the quilt is made up of squares, the quilting line goes diagonal through the squares' corners. Since we’re dealing with rectangles, and ones that are divided quite clearly already, I didn’t want the diagonal stitching to be a distraction. I decided to stitch in the ditch with the clear quilter’s thread between each color divide. This hid the seam on the face, and it’s barely noticeable on the back.
One thing to note about the back. I didn’t want to ruin the beauty of the Flame, so I decided not to sew through it. I marked where the Flame was with a pin, and stopped my seam right at that line. This made the red layer and gray layer not completely sewn through, but the results are amazing! You don’t notice the seam isn’t all the way across on the face, and the Flame really stands out without seams going through it!
Step 8: Bias tape
Bias tape comes in many sizes, colors, and materials. They make a special satin bias tape for quilts—usually seen on blankets made for babies. The quilting bias tape is a lot thicker and softer than the other types. It’s a great choice for this project. However, you can also go with the double sided bias tape. This has its benefits too. For one, it’s smaller, so it makes the edges less obtrusive into the final product. On the other hand, that smaller size makes it more difficult to sew. Pick which ever one you feel most comfortable with. You can also customize the color. Mavin chose yellow to match her fleece backing. I decided to go with white because it looked the best with the Ajah colors and the black on the back.
If using double sided bias tape, the ideal way to use it is to unfold it and sew down one side first. This gives you nice, clean seams and you’re sure the catch all layers of the fabric in one go. It’s also very time consuming. I chose to sew both sides at once. It’s more difficult, but cuts the time in half.
First, I left about four inches of the tape un-sewn.
Then, using the clear quilter’s thread, I stitched down the bias tape, making sure to pinch all three layers together as I went. I stopped every five or six inches to readjust and make sure all the layers were being caught in the thread.
At the corner, sew to the edge and then back stitch a few inches. Fold the tape at a ninety degree angle and fold under the edge at a forty-five degree angle. Stitch to the edge of the angle, then with your needle in the down position, lift the foot and rotate the quilt ninety degrees to align with the next side. This is an easy way to get a nice looking corner!
When you run out of your first bias tape here’s a trick for making it look continuous. (I used about two and a half packages, meaning I had to sew the tape twice.) First, stop with at least six inches un-sewn. Take the new bias tape and the edge of the old tape and unfold all the sides.
Lay them flat together, right side to right side.
Straight stitch them as close to the edge as you can get.
Trim off and excess. Fold it back under.
Now it looks like it’s all the same tape! Keep sewing the tape down in the same manner.
Once you get to the end of the quilt, use that same trick to join the very beginning and the end. Stop about six inches from the end and cut your tape to the correct length needed.
Stitch the bias tapes together, right side to right side, and then fold it all under. Stitch the seam all the way closed.
And you’re done!
Now you have a great Ajah quilt to snuggle up with, or just to throw over the couch as a way to make visitors ask questions.
Next time, we’ll use the scraps from the quilt to construct an Amyrlin Stole! Thanks for reading!
- 2 comments
- 3141 views

- 2 comments
- 3117 views
The first bit of artwork I found made me laugh. I am almost tempted to make little bookmarks out of it and pass them out at the next JordanCon.
New Children of the Light PSA ~ minniearts
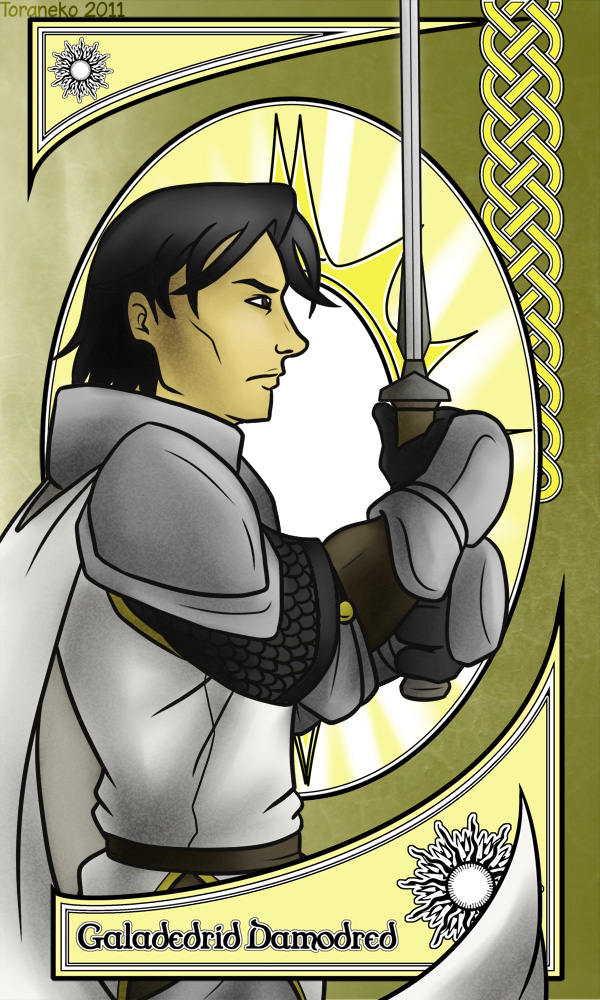
This next piece shows my personal favorite Whitecloak: Galad Damodred. The style this artist used reminds me of a playing card; deal me in!
The Knight ~ ToranekoStudios
I also wanted to show off a work of art done by one of our own members of Dragonmount! I think this manga style lends a bit of cuteness to the often stern character that is Galad.
Galad Damodred ~ Dawnflower8
Eamon Valda is one Child of the Light that you don't have to bother asking if he is bad or not. I think this piece really captures the scorn Valda is so well known for.
Soldier of Light ~ ianxfalcon
My last selection for this week is one that I think captures the real emotion I get from most Children of Light in the series: condescension. They tend to think that they are better than others, and have a real sense of disdain for anyone who is not one of them. This I think is captured by the quite literal way in which he is turning his nose up.
Child of Light ~ AndreaRule
That's all for this week; stay tuned for next month's "Fan Art Friday!"

Materials needed:
About a yard to two yards of fabric
Elastic
Sewing machine
A pair of pajama pants that fit well
Step 1: Find comfortable fitting pajamas
This project is easy because you don’t need a pattern. You simply copy a pair of pajama pants you already own. And if you’d rather they be pajama shorts, all you do is use shorts at the template. Super simple.
Step 2: Select your fabric
As stated already, I found a fantastic Pokémon fleece.
I bought it on sale, probably $6 a yard. I purchased two yards, just to be on the safe side.
With projects like these, you can customize your outfit as much as you want. Would you rather Star Wars pajama pants? Buy a Star Wars print. Would you rather flannel instead of fleece? Buy flannel; the pattern works the same on all types of fabrics. Would you rather have Pokémon print on one leg and Mario Party on the other? That’s doable, too!
I like to work with fleece because it’s such an easy fabric. It doesn’t fray, so you don’t need to worry about hemming. The lazy side of me loved that there’s less work involved.
Step 3: Trace your pattern
I’m going to include pictures from another pair of pajama pants I made since they turned out a bit better. Those were crafted out of flannel, so you can see how any fabric will work fine.
First, take your existing pair of pants (or shorts) and fold them in half. Lay your fabric on the floor and fold up one side, just long enough for your folded pants to fit.
Trace with a fabric pen, leaving about an inch in all directions for seam allowance. One thing to note here: make sure you stretch out the waistband. Typically, pajama pants have elastic along the waistband which makes the top much smaller than you actually need. Stretch the waist out as far as it can go, then trace. Otherwise, the top will be too tight on your stomach.
Once it’s traced, cut out the fabric.
When it’s unfolded, it’ll look nothing like pajama pants.
Step 4: Repeat for the other leg
On your fabric, lay flat the piece you just cut. Trace around it—leaving no room for seam allowance. Cut it out. Now you have two identical pieces.
Step 5: Sewing the legs
Place these two pieces atop each other, right side to right side.
First, you’re going to sew along the curved line. Do this on both sides.
Next, you need to open up the fabric and fold it so the two seams you just sewed are touching.
Now, you can see how these will eventually become pants. Sew a straight stitch from the bottom of one leg, up to the middle, and down the other leg.
Step 6: Adding the elastic
For the top hem, fold the waist down wide enough to fit your elastic in. Sew a straight stitch all the way around, leaving an opening about 2-3 inches wide.
Cut your elastic to be about the length of your waist—when stretched—and add a half an inch. Using a safety pin, thread the elastic through the casing at the top of the pants. Once the elastic is pulled all the way through, use your sewing machine and stitch the elastic to itself.
Now you can sew the rest of the waist seam.
Step 7: Hemming the legs
Now that you can get the pants on you, find out how long you need the legs to be. If you’re using fleece, you can simply cut with scissors and be done. Or, trim the legs an inch longer than they need to be, then fold the hem inside that inch and straight stitch it down. Do this on both legs.
And you’re done!
This project is so easy to do! Just imagine all the pajama pants you can have!
Please join us next time when I show you how to make an Ajah inspired blanket! Thanks for reading!
- 0 comments
- 2667 views

I Am Not a Serial Killer
Dan Wells
Synopsis:
John Wayne Cleaver is not your normal high school student. He suffers from antisocial personality disorder, and has the three main traits shared by 95% of all serial killers: he wets his bed, he is a pyromaniac, and he is cruel to animals. But knowing he has the makings of a serial killer inside him steers John down a strange path. He puts rules in place to ensure he doesn’t kill anyone. He doesn't want to be a serial killer.
When a real serial killer settles in his small town, John has to break a few of his rules in order to ensure the safety of his fellow humans. Once John starts breaking the rules, it’s hard for him to stop. He lets out the monster within him, and now there’s no putting it back inside.
Pros:
This book was amazing. It’s pacing kept me hooked continuously; there was never a moment when things slowed down. The characters were also developed very well. Though John suffers from antisocial personality disorder--and that makes him look at life, reality, humanity in a different way--he was still believable and real. The relationship, or lack of one, that he has with his mother is common. They acted like a typical family. And the humor, spaced through the dark and bleak scenes, added depth to this story. Dan Wells’ use of dark humor was incredible in the short story “I.E.Demon,” and that same grim hilarity is here as well.
Cons:
As stated, John has a few issues. This made him very hard to related to as he made decisions throughout the book. There were times when I couldn’t believe he was doing what he was doing, or that his thinking didn't coincide with my own. It distanced me from him, which is risky to do with your main character. However, these also added to the believable aspects of the world and the story. Even though I couldn’t get inside John’s head and understand his reasoning, I was fine accepting that someone would behave this way.
This story was also very gruesome. There’s murder and gore, plus John’s mother is a mortician, so there’s extra dead bodies around. Though the details aren’t terribly graphic, it’s definitely not for the squeamish.
Conclusion:
This is an excellent start to the series, does a fantastic job of introducing a flawed main character, and gets things set up the next book. The plot was enthralling, and the idiosyncrasies that made up John’s personality drew me in. I can’t wait to read the second book, “Mr. Monster.”
Rating:
4/5
If you’re interested in picking up a copy of I Am Not a Serial Killer, you can get it here at the Dragonmount eBook store.
- 0 comments
- 3984 views

Harriet McDougal (Robert Jordan’s widow/editor) has shared that the issues have been resolved and the rights to the Wheel of Time has been sold to a major studio. Please stay tuned to Dragonmount’s Front Page for further information as it comes in. Tor's Leigh Butler weighs in on the subject with her picks for casting.
JordonCon was held last month and many of our Dragonmount members were able to attend. Our very own Jason Denzel was in attendance, as were Brandon Sanderson, Harriet McDougal, and the other members of Team Jordan, Maria Simons, and Alan Romanczuk. The Author Guest of Honor was Catherine Asaro and the Artist Guest of Honor was John Picacio.
After the opening ceremonies--hosted by the 13th Depository's Linda Taglieri--the events included the Thursday evening Director’s Dinner, the JordonCon Art Show, the Writer’s Workshop, the Costume Contest, and spending lots of time meeting friends, making new friends, and engaging in rollicking fun.
Below you will find some pictures of this year’s JordonCon.
Check out more on JordanCon's official Facebook Photo page. Or, these beauties by Larry Barthel. You can also look at Mashiara's photos here.
See you next month!!!
- 0 comments
- 4766 views
For our very first piece of art, we have nail art done in the fashion of what the Amyrlin represents: to be of all Ajahs and none.
Wheel of Time Nail Art - The Stole of the Amyrlin Seat and the Flame of Tar Valon ~ The Nailinator
There were several notable Amyrlins from the series that we as readers became familiar with. The first being Siuan Sanche.
Flame of Tar Valon ~ fee-absinthe
I found this picture to be very interesting because of the medium used. The small bits of color really are striking meshed in with the scroll-like background!
And after Siuan, there was everyone's ~ahem~ favorite: Elaida.
Elaida Sedai ~ SicilianValkyrie
I find the look on Elaida's face in this piece to be so well done; it captures all the animosity she exuded in the books.
Vying for power against Elaida was my own personal favorite character, Egwene. I found her to be a great leader and very wise for her age. Of all the art from this week, this is my favorite. I find her here just how I picture in my own mind.
Flame of Tar Valon - Egwene Al'vere ~ endave
The final piece is one of Cadsuane. She is the last known Amyrlin Seat, and is certainly experienced enough for the job. I think this is shown particularly well in this piece, with her serene face not falling in the chaos around her.
Cadsuane ~ Jieroque
That's all for this week. Stay tuned for next month's edition of Fan Art Friday!
- 4 comments
- 6714 views

I found this cotton fabric at Joann Fabrics last year.
I’ve been a huge lover of Keroppi ever since I was little. I didn’t have any sort of project in mind, I only knew I needed to own this fabric!
Then I saw a tutorial for covering shoes in fabrics. It was the perfect way to put my Keroppi fabric to good use.
List of materials:
1/4 yard of fabric
Mod Podge glue (or equivalent)
Scissors
X-Acto knife (optional)
Shoes
Step 1: Select fabric
You all might not be as big a Sanrio fan as I am, so you might not see the appeal of Keroppi shoes. But, never fear! There are so many fandom fabrics available! If you’re comfortable shopping for fabrics online (which can be tricky since you can’t guarantee colors), try Fabric.com. You can also do places like Joann or Hobby Lobby, online or in person. Just a search of online fabrics pulls up everything from Harry Potter, to Star Wars, to Nintendo, and beyond! You can find a lot of fabrics to fit your fandom needs!
Step 2: Select shoes
I used canvas shoes, since I had an old pair with a hole. I’ve heard that canvas works best; the glue will stick better to this material. However, I also fastened a lacy fabric to leather shoes, and it worked fine (pictures of this are mixed in below because I had better pictures)! I suggest using an old pair that you don’t mind if it gets ruined.
Step 3: Construct and glue
Cut a rectangle out of your fabric that is long and wide enough to fit on your shoe.
Next, cut a slit in the center of one of the shorter sides, making sure the slit is long enough to cover the sides of your shoe.
Starting at the toe, use Mod Podge to adhere the fabric to the shoe. Do just a little bit at a time, no more than an inch in either direction. It works best if you let it dry for 10-15 minutes (or longer). But, if you’re impatient, it’s possible to do it all at once—it’s just stickier and messier.
Next, use the Mod Podge to glue down one side of the fabric. Pay attention and make sure that the strip of fabric on the side touches the rubber sole. Work your way to the back, leaving the top part of the fabric sticking out over the top of the shoe; we’ll fix that later.
At the back, trim your fabric so it’s a little longer than halfway. Glue it down. Let it dry.
Next, tackle the other side of the shoe, repeating the same steps. Except, when you get to the back, trim the fabric a little longer and fold under the end seam. This will create a thick divider between the two sides, similar to how the back of a shoe normally looks.
Once they’re all dry, you can start trimming the bottom. This is where the X-Acto knife comes in handy. Use it to slice the fabric right at the seam of the sole. In some shoes, there’s a tiny gap between the sole and the shoe’s material; you can use a pointed object to shove the sliced seam into this gap.
If you don’t have an X-Acto knife (and I don’t have one), just use a pair of good, sharp scissors to cut the fabric as close to the sole as possible.
Cut this way completely around the shoe.
Next, trim the top half of the fabric down to about an inch above the shoe’s top. Start where the shoe’s tongue would be. Cut a slit in the fabric at the corners, allowing you to fold the fabric under the tongue. If the shoe’s tongue is very curved, you can cut notches into the fabric for easier gluing. It’s a bit tricky to get the glue on the bottom part of the tongue. I deposited some glue onto my finger and applied it that way. Makes a mess, but it got the job done!
I’d suggest waiting for the tongue portion to dry before moving onto the sides.
Next, glue the sides down inside the shoe. Again, I used my finger to apply the glue, as it was a better way to get in at that angle. Work from the front to the back, and you can let it dry in portions for easier handling.
After your shoe is completely covered—and completely dry—you can add a top layer of Mod Podge to really seal them good. This makes them look shiny and pretty, but it also hardens the fabric, making the shoes very, very stiff. This worked fine for my Keroppi shoes—except getting my foot in is a bit of a hassle. If you left off the top layer, you could simply add a little bit of extra glue around the sole to ensure the fabric won’t come undone. This would keep the fabric a lot looser and give you a bit more comfort when wearing the shoes. That's what I did to the lacy pair; they have no rigidity from the glue at all.
Next, repeat everything on the other shoe!
Now you have two beautiful fandom shoes, ready to wear and be admired!
(Or in this case, be worn to a wedding....)
Next week we'll stick with the fabric theme and look at how to make amazingly comfortable Pokemon pajamas! Thanks for reading!
- 0 comments
- 2823 views

We know now, thanks to Team Jordan's Google+ Page, that the rights for a The Wheel of Time feature/television show have been resolved and they are currently in the works with a major studio. Here is the quote from Harriet:
That's all the information we have at the moment. We will update as soon as we learn more. Until then, let's all bask in the joy of knowing that our beloved series will still continue. It's not the beginning, but it's a beginning.
- 32 comments
- 32073 views

The Dragon Reborn Role Play has been revamped and it's now easier to navigate and engage in current threads! It’s open to any who want to roleplay within The Wheel of Time world!
The General Wheel of Time Discussion continues and features Verin, the Forsaken, the Choden Kal, Bors, and others. The Wheel of Time is so detailed and has such depth to its world and characters there will always be something to ponder.
DM Mafia has multiple games in progress for those that enjoy a mystery. Each game is labeled by skill, so you know what to expect before signing up.
The Aiel Social Group has been busy with their Humor Week and can boast six ongoing topics.
Shayol Ghul featured "Flatter the Nae'Blis" this month and some interesting games, one that includes an "Executioner!"
The Wolfkin were still busy with "Chili Dunking" and held a serious discussion on "After Death," as well as a new game, "Email Game - Seers."
The White Tower and Warders Social Group featured events held by the Green Ajah and the Warders on the Tar Valon Board. M'Lady La Fluer has been sharing her beautiful Wheel of Time collages.
Dragonmount members have also been busy traveling and enjoying JordanCon! Stay tuned for a recap of the Con and a photo gallery of all the happenings!
- 0 comments
- 3230 views
In addition to this, awards have been incorporated into JordanCon. These are the first ever to be given out to JordanCon professionals, fans, and volunteers. Here are the winners:
One last announcement from the convention:
- 7 comments
- 4551 views

One of the first things I did upon reading the books of The Wheel of Time was try to recreate as many Aes Sedai type accessories as possible. I sculpted Great Serpent rings out of clay. I bought a cheap turtle broach because it reminded me of the angreal that was found in Ebou Dar. I fell in love with paisley designs due to its similarity to the Flame of Tar Valon.
It wasn’t until recently that I actually set out to sew myself an Aes Sedai shawl. The fringe was the intimidating part. Anyone could cut out a triangle, but having that beautiful, long, flowing fringe… that was the only thing holding me at bay. Lucky for me, my sister beat me to the punch. For Christmas in 2012 my sister crafted us Aes Sedai shawls. They were simply done, plain fabrics, and added fringe. For her own shawl, she sewed a Flame of Tar Valon onto the middle; for mine, she drew in on with a black permanent marker. For a first ever attempt, they were amazing!
At JordanCon 7, I retired my old shawl and had it signed by Team Jordan. Now it’s hanging on my wall along with all my Wheel of Time artwork.
Now, before we go any further, let’s establish what exactly an Aes Sedai shawl is. To do this, I turned to Wheel of Time expert, and esteemed member of Team Jordan: Maria Simons. She told me that, “According to Jim [Robert Jordan], the only mandatory elements of the Aes Sedai shawl were the White Flame and the fringe of a color to match one's Ajah. Other than that, there could be great variation in size, the length of the fringe, and the fabric of the shawl itself. Many times (perhaps even most of the time; I'm not entirely sure), the shawl was embroidered with vines and leaves; the choice of vines and leaves was left up to the Aes Sedai. The actual color could vary as well; a Blue's shawl could be fringed in any shade of blue.”
In terms of style, that leaves this project wide open! You can literally choose any fabric you want, and as long as the fringe is your Ajah’s color, you’re good to go!
Step 1: Materials
Here’s a quick list of materials you’ll need to complete this project:
About 2 yards of main material
About 2 yards of a liner/backing material
About 3 yards of fringe
White fabric scraps for the Flame
Sewing machine
Thread
Pins
Fray Check (Optional)
As previously stated, you can pick any fabric you want. Silk, satin, gauze, jacquard, cotton, etc. In most cases, crafted shawls are typically done in fancy, shiny fabrics. Satin is a good choice because it’s very beautiful (though tricky to sew with). Jacquard was my first choice because how thick it is, and the shiny quality (but it’s usually expensive). Cotton is also a great fabric because of the ease of use, and how well it could be embroidered with vines and leaves if the desire arose.
In the end, I picked an outdoor upholstery fabric.
It was the perfect combination of thick, durable, and decorative! It has a sort of leafy pattern which fits very well into the Aes Sedai theme. While making a shawl for myself (in my Ajah color of White), I also picked up extra fabric for all the other colors as well. The Yellow and Green I gave to friends. The Blue and Gray are finished and hanging up in my closet. The Red and Brown still need to be completed.
Now a word on lining/backing fabric. This step is technically optional. Since most people will never see the back, if it's not nice and neat, that's not a problem. But there are some advantages to having a backing fabric. If you use a cotton, or a non-slip fabric, the shawl will sit nicer on your shoulders. I stupidly used a white satin-type fabric for my backing and it constantly needs to be held in place.
Lastly, you’ll need fringe. I found mine at a fabric warehouse. It’s about 4-5 inches long. Personally, I like longer fringe, but it’s very difficult to find in-store. Your best bet is buying online, but then you risk the colors not being what you expect. A great place for online fringe is Crazy Crow Trading Post. Almost everyone at JordanCon recommend buying fringe there.
Step 2: Triangles
Seriously, this project is very, very simple. It consists of sewing three straight lines to form a triangle. That’s basically it. Sure, there is the added difficulty of the Flame on the back, but if sewing those curves is what’s stopping you, there are other ways to get the Flame secured.
Start by measuring your wingspan—that is, your right palm across your shoulders to your left palm. You want the width of your shawl to be AT LEAST this long.
Next, measure the length from the base of your neck to the middle of your calf. This is the rough estimate of the length of your shawl. Of course, this is all based on the personal preference of the Aes Sedai, so if you want a shorter shawl, make it shorter; want it touching the ground, that’s where you measure to.
For my shawl, my wingspan was 60 inches. My length was 38 inches. The fabric I bought just happened to be 60 inches across, so all I had to do was measure 38 inches and cut my rectangle.
Next, you want to find the center of your rectangle on the longest side. This center spot will be the point of the shawl. Mark it, and then trace a line from that point to the top right corner. Repeat the line from the point to the top left corner.
Cut along the lines and you have your basic shawl already done! If you want to use a backing fabric, you can repeat these directions and make another triangle, or you can trace your shawl on top of it and cut it out that way.
At this point, you have the option of using Fray Check on your fabrics. Fray Check—or something similar—is used to keep the material from fraying after it’s been cut. Some fabrics don’t fray, like knits, spandex, fleece, and velvet. If your fabric does fray, applying Fray Check makes the seam so much nicer!
Step 3: The Flame
Adding on the Flame is an essential step to any Aes Sedai shawl. It is what makes it an Aes Sedai shawl. You also have a few choices about how big you want it to be, what fabric you want to use, do you want it fancy or plain.... This is a great way to customize your shawl and make it your own.
Since I had scraps of my beautiful, white material, I used it as the Flame for the Green Ajah shawl I made. This turned out really cool, because I was able to line it up, and keep the pattern continuous. For my shawl, since it was already white, I needed a material that would stand out enough. I used the same white satin I used as my backing.
First, you need to cut out the pattern. I just printed one from online. This way, you have perfect lines, and you can blow it up or shrink it down to the size you want.
Cut it out, and trace it on your fabric. For the Green Ajah shawl this was a bit more complex because I had to get it lined up properly:
I also applied Fray Check to the Flame.
Pin it on.
And sew!
I started at the point because that was the trickiest part. But you're welcome to do it the way that's more comfortable for you.
And here we have it:
Now, an alternative to sewing would be using a fabric adhesive. You can get fabric adhesive that is double sided—I used Pellon Peltex Two-Sided Fusible fabric adhesive. This is basically a glue that melts with the heat of an iron and binds the two fabrics together. I’ve used this method successfully on quite a few projects. If you cut out a layer of adhesive that is the same shape as your Flame, you can glue it to your shawl in as little as five minutes. Super simple!
Step 4: Sewing the pieces together
Here’s where it all starts to come together. Think of your shawl as a sandwich. You have the top and bottom buns (the shawl face and the backing) and you have the yummy toppings (the fringe). That means, you need to sew with each item in the proper order to get it looking right.
FIRST place your shawl face (the one with the Flame sewn on) face down on the floor.
NEXT put your fringe on top, layering it so it completely covers both sides and the point at the bottom.
THEN put your backing fabric face up. Think Grilled Cheese: you want the top and bottom to both have the yummy browned buttered side showing. So you want the right side of your shawl and the right side of your backing fabric to be facing out.
Pin this all together.
Sew only the angled sides with fringe. Start at the point and sew a straight line to the top left corner. End your seam. Start at the point again and sew a straight line to the top right corner. End your seam. Sew a line straight across the top to completely close in the shawl. End your seam. Trim off any excess fabric at the top and apply a coat of Fray Check if necessary.
Another method would be to tuck the top of the shawl under a half an inch or so and sew it close. This is the way I did it, but it was more difficult. It caused bunching at the corners, which is not very pretty.
Step 5: Finishing touches
Now all you have to do is pull off the fringe safety string and cut off any stray strands that are too long!
Wear your shawl with pride! Not only are you filled with the sense of accomplishment, but also with saidar.
Next time, we’ll switch gears a bit and show how to make fandom shoes. Thanks for reading!
- 0 comments
- 4730 views
It is with great regret that I must inform you, do to ever increasing cost of internet services, servers, networking equipment and electricity, Dragonmount now costs us more than ever to run. The Administration and I have discussed a number of options and have decided that, to help cover the costs for running and upkeep of the site and forums, we will be switching to a downloadable content system wherein certain features will cost money (USD) for you to use.
We are hereby giving all our users a two week notice that, as of April 14th, the following changes will be placed into effect.
Users will be allowed to select one free avatar when they join the site, after that, each Avatar Change will cost $5.
Users will be limited to 50 posts a day, after that you may pay $5 for an additional 50 posts. For those who wish, an unlimited number of posts may be purchased for $100 per month.
In addition to these changes, we are also implementing a few other new features
New Signature Controls - Under the new system, you may have separate signatures for each board/group. Setting a signature for one group area will not set it for any other area. Multiple charges will be made for each area you wish to add a signature to. To facilitate this, your current signatures will be removed on the 14th and will cost $10 per month to add to your profile for the selected board.
Voice Chat - The old text based chatroom will remain free, however, a new chat system allowing for voice chat between members, will cost $10 per month to access.
Video Chat - What's better than voice chat? Video Chat! For just $20 per month you will have access to video chat with other members.
Group Swap - Are you tired of your old social group but not wanting to loose all the effort you put in raising your points and internal ranking? For $25 you can move to a new Social Group and migrate to the internal rank closest to your current one.
Obviously: April Fool's!
- 10 comments
- 6717 views

This month, I’d like to highlight our Debates and Discussion Forum. It is an election year here in the United States and D&D is the place to voice your opinion. Of course, the forum isn’t exclusive to the United States and you will find topics that range from climate change to Europe’s immigration crisis.
Mafia games are popular here at Dragonmount. Members put in quite a bit of time to make the games unique and fun. The games can be found in its own section, as well as other Social Groups that allow for it.
The Black Tower featured Mafia memes and a Winter Shadow event. Moving on to Spring……we’ll see what direction the group takes in next month’s Roundup.
The White Tower and Warders have been busy. A both informative and fun event was held for International Women’s Week. The Red Ajah hosted and did a bang up job.
The Band of the Red Hand is busy training new recruits, discussing music, and talking about who has re-read The Wheel of Time books.
The Aiel Social Group offers a March discussion on “What is Truth,” and fun stuff including “Typing With Your Eyes Closed” and “50 Things Never To Do On A First Date.”
The Ogier are discussing “Winter Unpleasantness” and “Edgar Allen Poe vs Stephen King vs H.P. Lovecraft.” Plus, there's a game of hangman that has been ongoing for a few years.
The fun-loving Shayol Ghul Social Group is featuring a couple new games: “Mating Dance” and “Executioner–Issue II: The Chopping Block.”
The Wolfkin are having fun "Stating the Obvious" in their very exciting game.
ACW Tuathan’an Camp’s Hobby Wagon is featuring “Accidental Gardening.”
There's still plenty going on around the Dragonmount forums, so see what else you can find! See you next month!
- 0 comments
- 2556 views

I adored the mistcloak and realized it's really only lots and lots of strips! What could be hard about that?
Step 1: Gather materials
This project required a lot of different kinds of fabric, but not much of each. I went in on this with my sister, Mavin, so we were able to buy the fabrics in bulk and make two cloaks. This cut down on the price.
First, you need a base material, which serves as the solid around the shoulders and neck that the strips get sewn to. In my inspiration photo, you can see how her base material was thick and decorative. I went with a cheaper option. I chose poplin, a semi-heavy but durable fabric, in a solid gray. This material is great to work with, easy to sew and very forgiving with mistakes. It flows well and has great weight if you used it for a project that required a lot of length.
I only needed about half a yard of this material for the base, but I also liked it enough to include it in the strips. Therefore, I bought about 2 yards. I got it relatively inexpensive, about $4 a yard.
For the strips, I chose a variety of fabrics. I picked a sheer, gray organza, and a gray satin. Again, I got 2 yards of each material. However, the satin I got at Walmart for $1 a yard, and the organza was about $2 a yard at a fabric warehouse.
So, a list of materials would include:
2 yards of 3+ fabrics
Sewing machine
Scissors
Pins
Tailor’s chalk
Pinking shears/pinking rotary cutter
Lace/fringe for embellishment (Optional)
Step 2: Get your pattern
The best way to start this is with a circle. If you've ever made a circle skirt, you know what I'm talking about. The circle will be the fabric that sits on your shoulders, the cloak-like part that is solid.
For this, all you need to do is measure the circumference of your neck and divide by 4 (you can add on an extra inch if you don’t want it completely flush with your neck).
The next measurement you want is from your neck (where it meets your shoulder) to the end of your shoulder. I started with a neck to shoulder measurement that was much longer than necessary, and I wound up trimming it as we continued.
Once you have your measurements, you can draw your pattern. Take your base material, lay it on the floor, and fold it in half. Find the center and make a mark. If you have tailor’s chalk, that would work very well. If you don’t, you can use any sort of marker that will be dark enough; just make sure you cut on the inside of the marker so you don’t see it in your final product.
From your central mark, use measuring tape to find the correct distance (neck circumference divided by 4). Mark that distance. Repeat on the other side. Then, using a compass, or a string and a pushpin, connect those two points using an arch.
Next, do the same for your shoulder-neck length. Mark on both sides and connect using an arch.
Cut along both lines and you have your shoulder base!
Now, onto the strips. This all depends on your height, as the strips need to be as long as you are (well, from your shoulder to your feet). I’m only 5’2”, so my strips only needed to be about 50” or so. What we wound up doing was making them too big, just to be on the safe side, and then pinning them to the appropriate length. More on that later.
To cut out the strips, we used a rotary cutter. This was one of our many bad ideas on the project. This decision would have been okay if I wasn’t totally lazy. But since I am, once I had my strips, I wanted to sew them on. I didn’t take into account the fact that all three fabrics frayed like crazy. The ideal solution would have been to have a serger (which I don’t have), or to stitch under the edge of every single side of every single strip.
Our lazy solution was to use pinking shears (or you could use a pinking rotary cutter) to finish the edges. This was also difficult to do with the shears because we had to redo the seams on each strip. Using a pinking rotary cutter from the start would have been the best lazy option.
We used 36 strips per mistcloak. Obviously, more would have been better.
Step 3: Pinning and Sewing
First, let’s tackle the base. We have the circle, so now we just need to cut a vertical line straight up and down to make our opening. To create clean hems, fold each side under and stitch. Do the same with the circle that is closest your neck. I (stupidly) used white thread which makes the seam super obvious. I would suggest using a color that blends in better.
Next, I cut two long strips of the poplin and turned them into ties. Mavin decided to use a clasp to keep her cloak together. Again, this is a way to make it yours and unique.
With that done, now it’s only a matter of pinning the strips into place. This would be difficult to do on your own, so I would suggest having a partner help. I put my base on and Mavin pinned all my strips in place. We did a bottom layer, with the strips next to each other, and a top layer, with the strips staggered.
Here was lazy mistake number two. After they were pinned, I didn’t want to bother with removing the extra length at the top. I just sewed them all down. This created a very ugly, tattered look, with random strips cut off near the base. To cover this, we decided to add a little bit of frills in the form of lace. I bought a double layered black lace, about two inches long. Mavin went with a three layered lace that was about four inches. Again, customize.
Lucky for us, this covered the ugly seam and made it look a little fancy!
Step 4: Accessorize
We wore these mistcloaks to the Phoenix Comicon the next year. I was going for a Vin look, but Mavin was more or less just another mistborn. We both had our allomancer metal vials that we bought from Brandon Sanderson’s official store. I even added in a single stud earing to my ear. Complete the look with black leggings and a black shirt. Now you’re ready to rock your mistcloak!
And here I am with a No Face cosplayer. I adored the detail on her outfit!
Stay tuned for next time when I’ll show you how to make an easy Aes Sedai shawl!
- 2 comments
- 5246 views
There will be slight spoilers below. Read at your own risk!
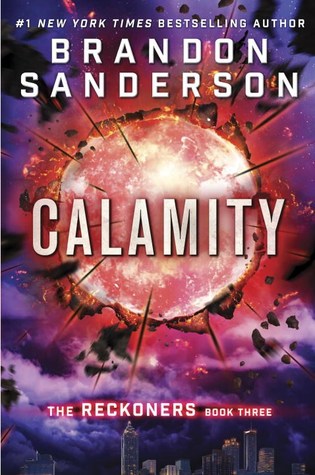
Calamity
By Brandon Sanderson
Synopsis
After the events in Babilar, David and crew are out on a new mission: remove the darkness from Prof—AKA Limelight—and free him from the evil of his powers. To do this, the group needs new allies and new plans. After getting what they need from an unlikely source, they set off for Atlanta (Ildithia, the city of salt).
However, there are a few things left to worry about. First, David still hasn’t come to terms with the fact that he might be an Epic himself. And there’s still the little problem of finding out Prof’s weakness before they can face him in combat. Not to mention that the David still have plans of killing Calamity, the Epic of Epics.
Pros
I will not deny that I’m a huge fan of Brandon Sanderson. His writing is phenomenal, thought provoking and humorous, dark and optimistic, and this novel is no exception. He’s a master with action, moving the plot forward constantly. At the same time, the depths of character development and motivation is clearly explored and satisfying.
David’s character is wonderful. He’s funny, dedicated, hardworking, and a true leader. As the new leader of the Reckoners, he grows. He suddenly sees how difficult it is to be the one in charge, waiting for the right moment to strike instead of rushing in prematurely. His underlying powers—used more by accident—are interesting in the way they don’t shape him. All the Epics we’ve seen have been driven by their abilities and it’s nice to see the flipside of that in David.
I also loved the dynamic of the relationship between David and Megan. It’s a partnership, each one risking their lives repeatedly as they continue their mission, and letting the other risk their life. It’s so common in fiction to see a partner become overly protective, and while David and Megan do fear for each other’s lives, they understand that it’s necessary. There’s no coddling or making the other sit out; they respect each other enough to know that is not an option.
Cons
While the pace of the book was well done—the action keeping the story constantly moving—there was a feel of being rushed with the ending. David sets up his plan early on to 1) Rescue Prof 2) Destroy Calamity 3) Save the world. So when the book’s three-quarters done and step one hadn’t been completed yet, there’s a bit of a sense of rushing. And while the ending was very well done, greatly satisfying, and absolutely logical, it was difficult to not feel impatient for the conclusion.
Conclusion
This book was fantastic, a truly wonderful read. David’s observations were often comical and I laughed a lot throughout the story. It’s a great combination to have war and death mixed with light-hearted humor. Of course, that’s always something Sanderson has excelled at, in my opinion.
Though the trilogy is complete, I feel there is a lot of room for exploration in this world (and parallel worlds). I really hope that, if Sanderson has time, some of these avenues will be revisited in the future.
Rating
5/5
- 1 comment
- 6105 views

I'd like to start with the "Wheel of Time Discussion." Think you have heard it all? Readers continue to discover the series and present new theories and questions such as "What happened to those who were 'turned' and other issues not addressed in the Companion" and "How can I get people to read it?"
Now onto the Tinker's Guild. The Writer's Wagon notes that our very own Mashiara Sedai has finished her 6th novel and in the Arts and Crafts Wagon, Nynaeve continues to bring us her wonderful and creative bead animals.
The Aiel presents with some interesting topics such as “Relationships that have changed you” and a discussion on the merits (or not) of “Higher Education.”
The Band of the Red Hand offers a fun place to relax and have a beer with “The Beers of the Red Hand.” In addition, the Band has a very active Skype Group.
In February, the Black Tower hosted a Valentine’s event and “Book Challenges and Reading Advices.” Most importantly, the Shadow wished two newlyweds well.
The Ogier Social Group offers many games! Hangman, Winter Unpleasantness as the Stedding protects us-from A-Z, The Name Game: Plant Edition, Movie Quote Game, Change a Letter, and Choose your own Adventure: Journey under the Sea, just to name a few.
Shayol Ghul has started a “Mating Dance” and announced a “New Moridin.” They also offer a new story “Grayman’s Task” and “The Executioner.”
The Brown Ajah of the White Tower and Warders held a “Chocolate Fest!” Check out "Chocolate Videos" and "Chocolate recipes."
The Wolfkin are “Freezing their Tails Off” and engaging in “Chili Dunking.” Their discussion this month is “Magical things in Life” and the game is “State the Obvious.”
As you can see, Dragonmount offers something for everyone. This is only a short selection of the "goings on" and if you don't see something that interests you, suggest a new event, activity, or game!
See you next month at Forum Roundup.
- 2 comments
- 2979 views
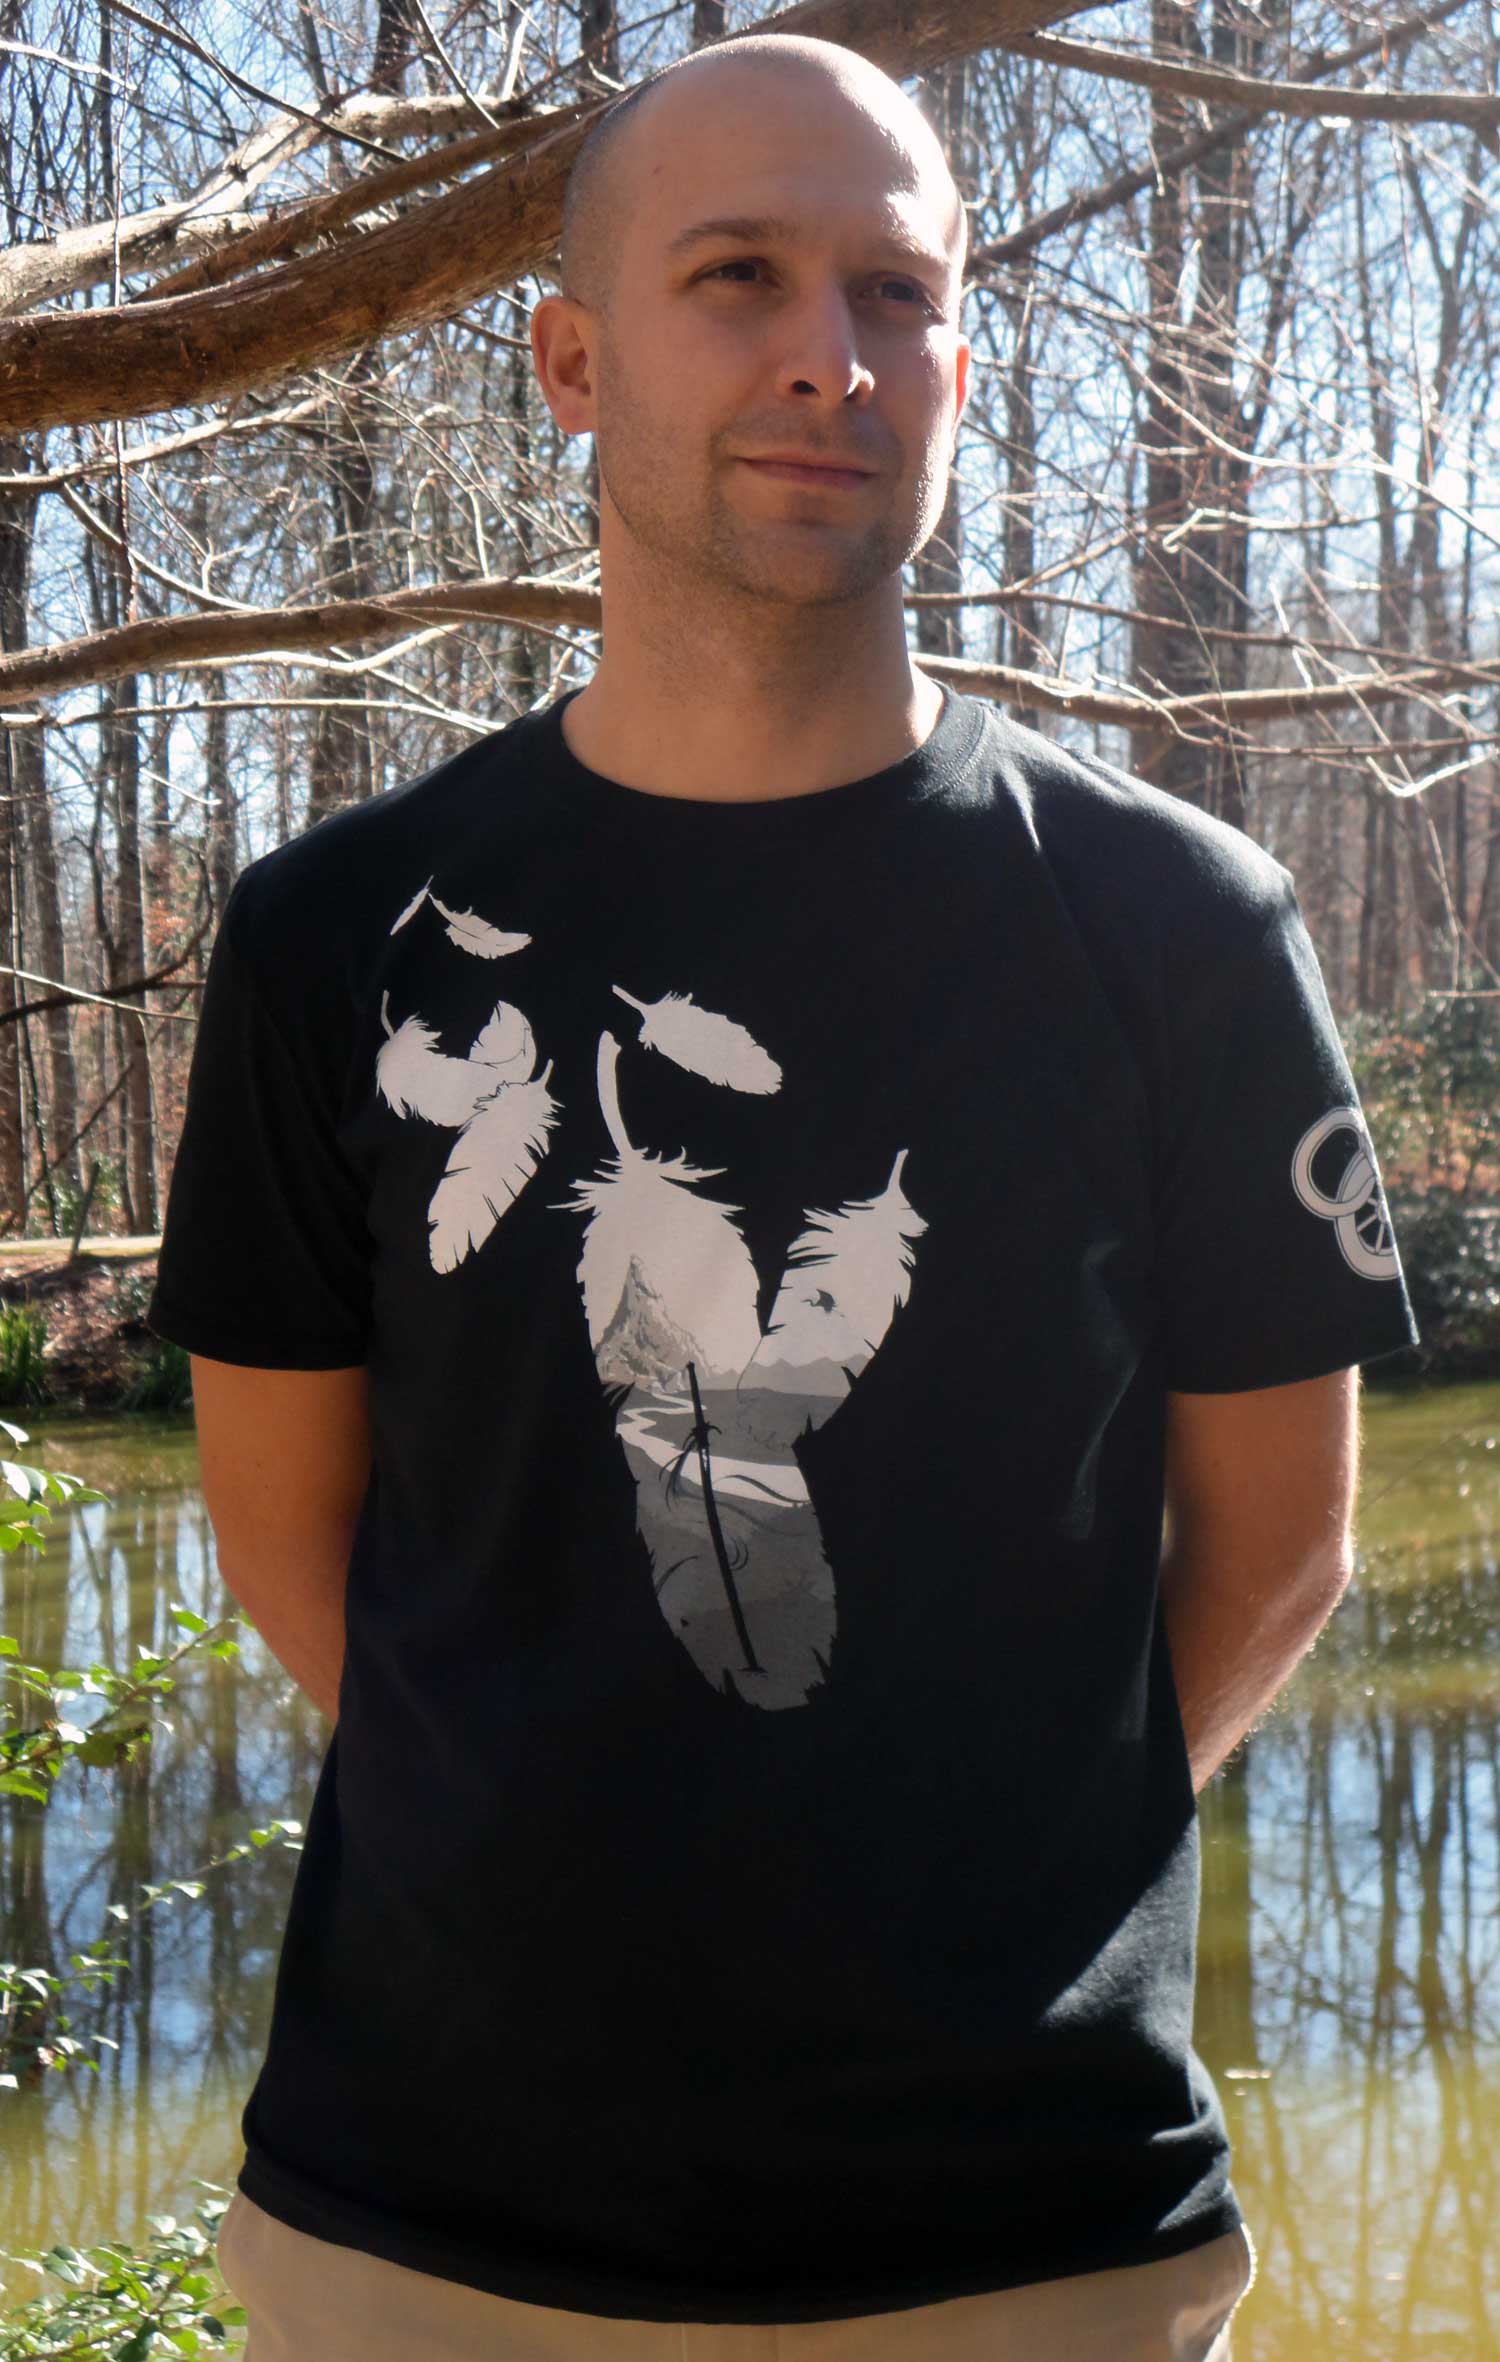
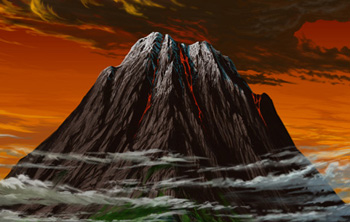
Ta’veren Tees is proud to have worked once more with officially licensed WoT artist Paul Bielaczyc on a new shirt, “Duty and Death,” now available for preorder at www.TaverenTees.com/dutyanddeath.
The 100% cotton tee can be preordered for a special price of $23 (regular $26) and will ship by March 7. All items ordered at the same time will be held and shipped with the new tee.
The art on the shirt shows a distant mountain – perhaps it is Shayol Ghul – with a heron marked blade in the foreground and a crane in flight, all framed by feathers. The concept alludes, of course, to the quote “Duty is heavier than a mountain, death lighter than a feather.” Though Rand takes up this mantra in the series, it is said to him by Lan Mandragoran and the sentiment fits both men’s stories, two journeys of burden and sacrifice.
Fact: In the real world, this phrase is very near one that is part of the first precept of the Imperial Rescript to Japanese Soldiers and Sailors.
To preorder your shirt, head over to www.TaverenTees.com/dutyanddeath now!
- 0 comments
- 3972 views
I do want to stress that everything I make is for my own, personal enjoyment. This is not something I make for others, or sell for profit. If you'd like to buy licensed Wheel of Time merchandise, please check out Ta'veren Tees.
Naturally, for this first edition, I want to feature one of my many Wheel of Time crafts. It was hard to pick just one! I decided on showing off my Aes Sedai dress tutorial. Besides my shawl, it’s the item I get the most use out of.
Step 1: Pick a pattern
This is actually pretty tricky. There are so many different styles of dresses that fit into the Randland theme/descriptions. Typically, we think of anything “Renaissance-y” as being fantasy, so you’re safe if you go in that direction. I went that route, choosing Simplicity Pattern 1773, Option C.
You can also be a bit more adventurous. For example, you can be a Tinker Aes Sedai and go with something like this:
Or a Cairhienen sister with something like this:
Even a Domani:
The options are endless. You can combine any nationality, with any color, with any pattern, and have it be an Aes Sedai dress.
Step 2: Acquire materials
Patterns can be difficult because they usually require a lot of fabric. For my pattern, I needed 6 yards. This can get pricey if you’re going with fancy fabrics. For that reason, I went to the cheaper side and selected crushed velvet, which is much cheaper--and less hot--than regular velvet.
Other materials needed will vary, but most likely include:
Sewing machine
Lining fabric
Thread
Scissors
Pins
For a price total, this can range from $20 for fabric and materials to $100+. It all depends on where you want to take it.
(And here’s a tip from people I trust--if you’re looking for multiple fabrics that match or compliment, try an inexpensive bed-in-a-bag which would have sheets, shams, bed skirts, and a comforter. When on clearance, you can’t beat that price!)
Step 3: Cut out pattern and fabric
This is my least favorite step because it’s time consuming and boring. But since it’s the first task, it’s nice to get it out of the way and move onto more interesting endeavors.
Cut out your pattern for the size you need. I always suggest to cut bigger because you can take it in. It’s much more difficult to increase the size afterward.
Next, lay your pattern on your fabric. It may take some adjusting and playing around to get all your pieces to fit. The pattern should include a diagram on how to do this, but it’s not always the best solution. For me, I had my crushed velvet in two pieces since I bought them on different occasions, so the suggested layout didn’t work.
Once you find what works for you, pin the pattern onto the fabric and cut them out. I always leave my patterns attached until I sew them so I don’t accidentally mix any up!
Step 4: Sew!
This is the fun part, in my opinion, because it’s when the dress starts to take shape. At the same time, it can be the most frustrating because you need to decipher the sometimes-difficult sewing terminology in the directions. Take breaks when you need them. Breathe deeply. You’ll get through it, and it will be worth it!
If you run into a snag with this step, there’s several outlets in which to find help. One being Dragonmount’s very own Tinker Social Group! There’s always someone to offer assistance to any craft project in the Arts and Crafts Wagon! You can also try other crafter’s forums like Craftster.
Step 5: Add embellishments
Besides choosing your style and fabric, you can also choose different ways to spruce up your dress. My pattern did call for ribbon along the neckline, but I decided to take it one step further and add lace.
When I was done with the neckline, the dress still looked a bit plain, so I mimicked the ribbon and lace motif with vertical lines running along the front of the dress along the seams. This gave it a nice pop of color and a little more frills!
Step 6: Enjoy
Now, just be seen in your Aes Sedai dress. Bask in the praise of those around you. Keep your chin raised and make sure to sniff at appropriate times. Before long, you’ll be projecting that Aes Sedai spirit!
Have you made an Aes Sedai (or some other fandom) dress? If so, please share your pictures, the patterns you used, your frustrations and joys! Next time, I’ll show you how to (poorly) make your own mistcloak!
- 9 comments
- 5444 views
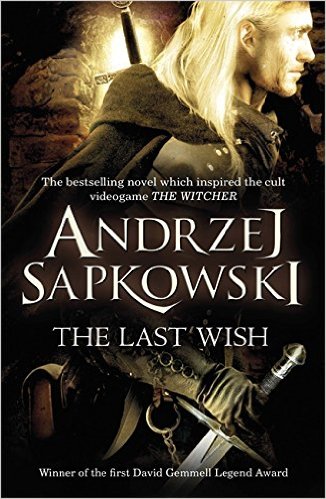
The Last Wish
by Andrzej Sapkowski
Synopsis
The book contains seven main short stories. The stories are independent yet connected.
The story The Voice of Reason connects all other stories. Other stories are flashbacks that occur during the course of the main story.
The Voice of Reason takes place in the temple of the goddess Melitele. Geralt, a witcher, is recovering in the temple after suffering some serious wounds trying to reverse a spell on a striga. Here he meets some characters that play an important role in some other stories. The local lords are not happy that he is staying there and try to make things difficult for him.
The Witcher is the story of the striga that caused the wounds from which Geralt is recovering from in The Voice of Reason.
A Grain of Truth tells the story of a monster like figure that Geralt meets during his journeys. The monster lives in a mansion in the middle of a forest. He has a rose garden and if anyone steals a rose, they have to give their daughter to him for a year.
The Lesser Evil is the story where a wizard asks Geralt to kill a girl because she might be a monster. The queen had tried to kill her on various occasions with the help of the wizard. She had ordered a huntsman to take her to forest and kill her. She escaped and lived with some dwarves for some time. When she meets Geralt, she asks him to help her kill that wizard.
In A Matter of Price, Geralt is asked to help a queen but told to figure out the details of the mission by himself. It introduces the Child Surprise, someone who has an important role in later books.
The Edge of the World is the story where Geralt and his friend, Dandelion, travel to the edge of the world. A "deovel" is destroying the fields and some villagers want Geralt to get rid of the "deovel" but the wise woman forbids him to kill it.
The Last Wish, the story after which the collection is named, introduces the sorceress Yennefer, someone who has been mentioned various times in the book. Geralt and Dandelion had found a genie and Dandelion tried to make the genie grant him three wishes. He does not get to utter the third wish because he is injured in the confrontation with the genie. Yennefer agrees to cure him so that she could use the genie for her own purposes.
Pros
Some of the stories are alternate versions of some popular fairy tales. It is easier to sink into the story once you find something familiar.
Geralt has a simple yet complicated character. He claims to be a mutant designed to kill monsters but his idea of monsters is different from everyone else's at times. Just when he starts emerging as a righteous character, an incident happens that makes him look evil and saves the story from becoming too dull.
Some of the stories are beautiful. A Grain of Truth has some lines that make you think twice. The ending of the story is bittersweet and managed to make way into my memory.
Cons
The book was originally written in Polish and the English version is a translated version. There are bound to be some things that it misses because of this interpretation.
Sometimes the characters are infuriating and the motive for their actions are contrary to what I had perceived the character to be.
Conclusion
All in all, it was an enjoyable read. It takes time to get used to the format of the story but after that it's fun to read.
Rating
I would give it a rating of 4.5/5
- 0 comments
- 3116 views

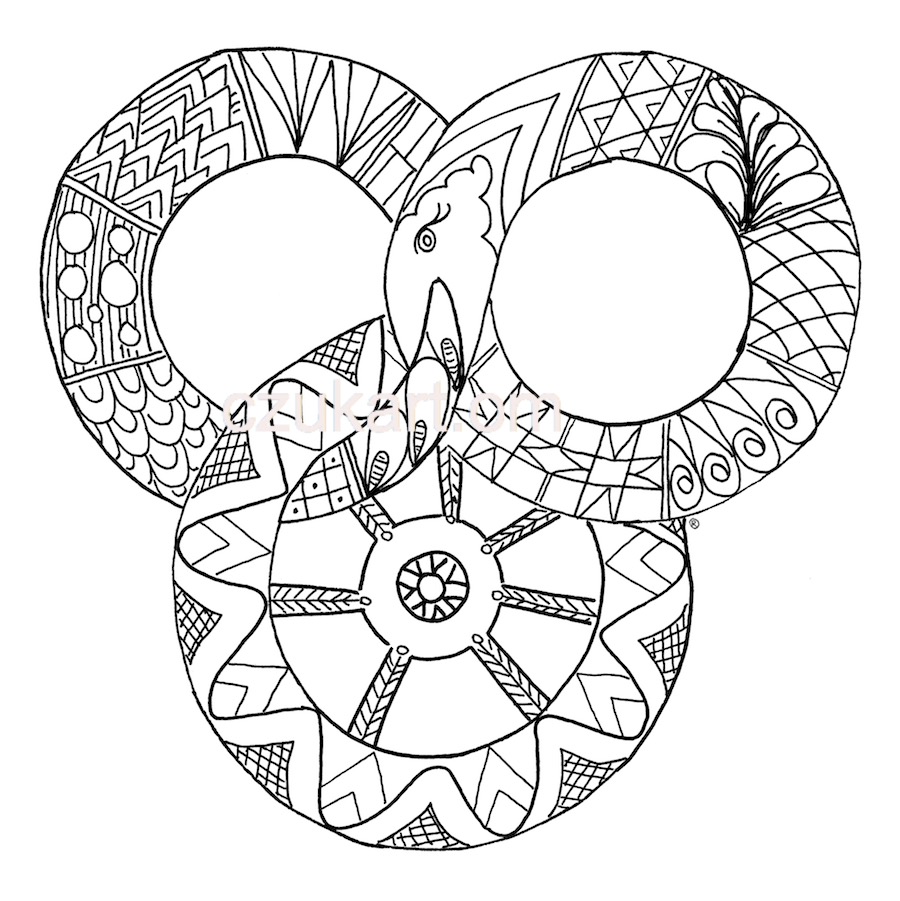
The poll is in the right sidebar. Your response will help determine how many coloring books to print. The more commitments to pre-order the sooner they'll be printed.
Details that will hopefully help to answer your questions:
•"Patterns of the Wheel" is an officially licensed book of coloring art based on The Wheel of Time™
•The book contains 20 designs by Amy Romanczuk
•Book dimensions are 8.5 x11 inches (21.2 x28 cm)
•Each drawing will be stand alone on a page of high quality paper (i.e. no bleed through to a drawing on the backside, or for easy removal should you want to display your art.)
•The drawings are all in my pysanky-inspired style. If you are not familiar with my art, you can visit www.czukart.com and check out some of my other works, including my first coloring book. (I will also post some thumbnails of in the comments.)
•I anticipate the pre-order price will be $20 (USD) plus shipping (my website will calculate USPS postage.)
•Preorders can alternatively be picked up at JordanCon, if that option is selected when ordering.
•A few books may be available for sale at JordanCon in the print shop and in the charity auction. The price will be the regular (TBD) price, not the preorder one.
•I am not able (my own reasons, not the Con's) to (wo)man a table in the dealer's hall, though I will have a display in the art show and some of the originals will be available there.
•Books will remain available on my website, after the pre-order time period is over, until all are gone. There are no plans for a second printing at this time.
•I can mail overseas (my site will calculate postage and include it in the purchase price.)
•Currently working with Ta' veren Tees so that some will be available through their shop/convention tables at other conventions.
•Poll results will be tallied in mid February and I will place the print order accordingly.
•You will still need to preorder when that option opens up. I will post in this thread and separately when that occurs.
If you could indicate the likelihood of your pre-ordering Patterns of the Wheel, a coloring book based on the WoT, please indicate so in the poll. There also are options for ordering multiple copies. At this point, there is no differentiation as to how you plan to receive your pre-order, but there will be on the website when the ordering opens up. Though this poll appears in several locations online, please only vote in one place.
Thank you all so much! Robert Jordan has the most wondrous fans!
- 1 comment
- 7043 views